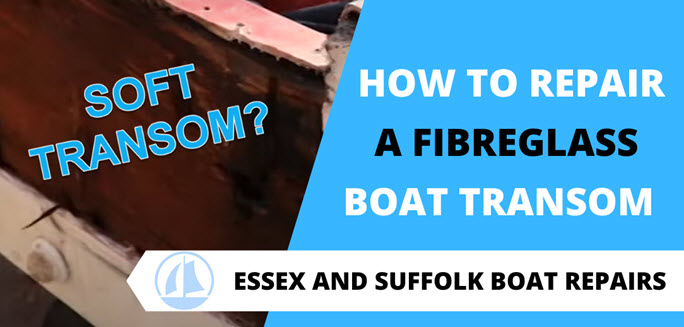
In this post I’ll be discussing how to repair a fibreglass boat transom.
A robust and dependable boat transom is essential for safe and enjoyable boating experiences.
The transom, typically constructed from fibreglass, plays a critical role in supporting the outboard motor and ensuring the structural integrity of the vessel.
However, over time, fibreglass boat transoms can develop issues that compromise their performance, such as delamination, cracks, and even rot.
In this comprehensive guide, we will take you through the step-by-step process of repairing a fibreglass boat transom.
Whether you’re an experienced DIY enthusiast or a novice, this blog post will equip you with the knowledge and skills needed to restore your boat’s transom to its former strength and reliability.
Let’s dive in and get your boat back on the water, ready for new adventures.
Table of Contents
Safety Precautions
Before we get in too deep I have to go over some important issues regarding working with power tools and fibreglass.
Safety should always be your top priority when undertaking any fibreglass boat transom repair.
Working with fibreglass materials and power tools can present certain hazards, so it’s crucial to follow these safety precautions:
Importance of Safety
Repairing a fibreglass boat transom involves using tools and materials that can potentially cause harm if not handled with care.
Safety is paramount to prevent accidents and injuries during the repair process.
Essential Safety Gear and Precautions
- Protective Clothing: Wear appropriate protective clothing, including long-sleeved shirts and pants to shield your skin from fibreglass particles. Use gloves to protect your hands.
- Respirators: Fibreglass dust and fumes can be harmful when inhaled. Invest in a quality respirator mask to protect your lungs during sanding and resin application.
- Eye Protection: Goggles or safety glasses are a must to shield your eyes from flying debris, dust, and chemical splashes.
- Ventilation: Work in a well-ventilated area or consider using a dust extraction system to minimize the inhalation of fibreglass dust and fumes.
- Power Tool Safety: When using power tools, follow the manufacturer’s safety guidelines and wear appropriate safety gear, such as ear protection if working with noisy tools.
- Fire Safety: Be aware that some chemicals and materials used in the repair process are flammable. Keep fire safety equipment, such as a fire extinguisher, nearby.
- First Aid Kit: Have a first aid kit readily available in case of minor injuries.
- Working Environment: Ensure your work area is clean, organized, and free from tripping hazards.
By adhering to these safety precautions and using the right protective gear, you’ll reduce the risks associated with fibreglass boat transom repair and ensure your safety throughout the process.
Assessing the Damage
Before embarking on your fibreglass boat transom repair journey, a thorough assessment of the damage is crucial. Here’s how to assess the condition of your transom:
Identifying Damage
- Visual Inspection: Begin with a visual examination of the transom. Look for any visible signs of damage, such as cracks, blistering, or areas that appear discoloured or deformed.
- Tapping Test: Gently tap the transom with a rubber mallet. A healthy transom will produce a solid, consistent sound. If you hear a dull or hollow sound, it might indicate delamination or rot.
- Probing: Use a small tool to probe the transom’s surface, especially around areas that appear suspect. If the tool penetrates the fibreglass easily, it could be a sign of delamination.
Signs of Damage
- Delamination: Delamination occurs when the layers of fibreglass separate, creating air pockets or soft spots in the transom. This is a common issue and can result from water intrusion or improper construction.
- Cracks: Cracks in the fibreglass are visible indications of structural damage. They may appear as fine hairline cracks or larger, more pronounced fractures.
- Rot: Rot is a severe problem that typically affects the transom’s core material. Signs include soft or spongy spots, an earthy odour, or visible decay. Rot often necessitates transom replacement.
Severity of Damage
The severity of the damage will determine whether repair or replacement is required:
- Minor Damage: Small cracks and delamination can often be repaired without transom replacement. These issues can be addressed through the repair process outlined in this guide.
- Moderate Damage: If the damage is more extensive or there are signs of rot, you might need to consider a transom replacement. This is a more involved and costly process.
- Consult a Professional: When in doubt, or if the damage is extensive, it’s advisable to consult a marine professional or surveyor who can assess the damage and provide expert guidance.
Understanding the extent of the damage is the first step in successfully restoring your fibreglass boat transom to its former strength and integrity.
Tools and Materials
Gathering the right tools and materials is essential for a successful fibreglass boat transom repair. Here’s a comprehensive list of what you’ll need:
Tools:
- Safety Gear:
- Protective clothing (long-sleeved shirt, trousers, overalls)
- Respirator mask
- Safety goggles or glasses
- Gloves
- Ear protection (if using noisy power tools)
- Power Tools:
- Diamond blade in a grinder or reciprocating saw for cutting fibreglass
- Jigsaw for shaping
- Orbital sander for smoothing surfaces
- Drill with mixing attachment (for epoxy/polyester resin)
- Hand Tools:
- Screwdrivers and pliers
- Putty knife or scraper for removing damaged material
- Utility knife or razor blades
- Sandpaper (various grits for sanding)
- Measuring and Marking:
- Measuring tape
- Pencils and markers for marking measurements
- Straight edge or ruler
- Clamps and Supports:
- C-clamps or bar clamps for holding pieces together
- Sturdy supports to hold the transom in place
- Fibreglass Roller or Brush:
- For ensuring proper bonding and removing air bubbles when applying fibreglass cloth and epoxy/polyester resin.
Materials:
- Fibreglass Cloth:
- E-glass or S-glass fibreglass cloth (chosen based on the required strength and durability)
- Epoxy Resin/Polyester resin
- Marine-grade epoxy/polyester resin for fibreglass repair (make sure it’s compatible with the fibreglass cloth)
- Filler Material:
- Fairing compound or filler for smoothing and filling imperfections
- Transom Core Material (if replacing):
- Plywood or composite material (choose marine-grade and waterproof options)
- Primer and Paint/Gelcoat
- Marine-grade primer and paint/gelcoat suitable for fibreglass, to protect and finish the repair
- Safety Equipment:
- Fire extinguisher and first aid kit
- Dust Extraction System (Optional):
- To minimize exposure to fibreglass dust during sanding
Ensure that you have all these tools and materials on hand before you begin the repair process. Having the right equipment readily available will make the repair smoother and more efficient.
Preparing the Work Area
Properly preparing the work area is vital for a successful fibreglass boat transom repair. Follow these steps to get your workspace ready:
1. Clear the Boat and Work Area
Start by removing any loose items, equipment, or personal belongings from the boat. Clear the deck and create an unobstructed workspace.
2. Support the Boat
Ensure the boat is adequately supported and stabilized to prevent movement during the repair. You may use boat stands, jack stands, or other suitable supports. The goal is to have the transom level and secure.
3. Protect Surrounding Areas
Cover any areas of the boat or surroundings that you want to protect from dust, debris, or potential spills. Plastic sheets or drop cloths can be useful for this purpose.
4. Ventilation
Proper ventilation is essential. Work in a well-ventilated area, preferably outdoors, to minimize exposure to fumes and dust. If working indoors, consider using a dust extraction system or fans to enhance air circulation.
5. Safety Equipment
Ensure that your safety gear is in place and ready to use. Put on your protective clothing, respirator mask, safety goggles, gloves, and any other safety equipment required for the specific task.
6. Organize Tools and Materials
Arrange your tools and materials in an organized manner within easy reach. This will save time and reduce the risk of accidents while searching for necessary items.
7. Workbenches and Lighting
If available, set up workbenches or tables to lay out your tools and materials. Adequate lighting is also essential for precise work, so ensure the area is well-lit.
By properly preparing the work area, you create a safe and efficient environment for your fibreglass boat transom repair. With everything in place, you can proceed to the repair process with confidence.
Removing the Damaged Area
Removing the damaged portion of the transom is a crucial step in the fibreglass boat transom repair process. Here’s how to do it safely and effectively:
1. Assess and Mark the Damaged Area
- Start by clearly identifying the damaged area. Use a pencil or marker to mark the boundaries of the damaged section. This will guide you during the cutting process.
2. Safety Precautions
- Prioritize safety when using power tools. Make sure you are wearing your safety gear, including eye protection, a respirator mask, and ear protection if the tool is noisy.
3. Choose the Right Cutting Tool
- Select an appropriate cutting tool for the job. A small hand grinder fitted with a diamond blade is a good choice or reciprocating saw is often used for this purpose.
4. Make Clean and Precise Cuts
- Carefully position the saw blade along the marked lines, ensuring that you cut straight and even. Apply gentle, steady pressure to avoid chipping or cracking the fibreglass.
5. Support the Transom
- As you near the completion of the cut, be ready to support the piece you are removing. This prevents it from falling and causing further damage or injury.
6. Disposal
- Safely dispose of the cut piece in accordance with local regulations, as fibreglass can be challenging to recycle.
7. Inspect the Cut Area
- After removing the damaged portion, inspect the cut area for any uneven or jagged edges. These can be smoothed out later in the repair process.
By following these steps, you’ll be able to remove the damaged section of the transom cleanly and precisely, setting the stage for a successful repair.
Always maintain a strong focus on safety and accuracy when working with power tools.
Replacing Damaged Core Material (if necessary)
In some cases, fibreglass boat transom damage may extend to the core material within the transom. If you find that the core material is damaged, follow these steps to remove and replace it:
1. Assess Core Material Damage
- Confirm that the core material (often plywood or composite) is indeed damaged. Signs may include soft or spongy spots, water infiltration, or visible decay. A healthy core should be solid and waterproof.
2. Remove Damaged Core Material
- Using appropriate hand tools, carefully remove the damaged core material. This process involves cutting or scraping away the compromised sections while being cautious not to damage the surrounding fibreglass.
3. Clean the Area
- After removal, clean the area to ensure it’s free from any debris or old adhesive. A clean, dry surface is essential for the adhesion of the replacement core material.
4. Select the Right Replacement Material
- Choose a replacement core material that is marine-grade, waterproof, and suitable for your specific boat and transom. Marine-grade plywood or composite materials are often used. Consult your boat’s manufacturer or a marine supply store for recommendations.
5. Cut and Fit the Replacement Material
- Cut the replacement core material to fit precisely into the void left by the removed damaged material. Ensure it matches the shape and size of the area.
6. Bonding the Core
- Use a bonding paste to bond the replacement core material to the fibreglass. Apply the paste according to the manufacturer’s instructions, ensuring even coverage.
7. Secure the Core Material
- Press the replacement core material firmly into place, making sure it adheres securely to the fibreglass transom. Use clamps or weights to hold it in position as the paste cures.
8. Allow for Proper Curing
- Give the paste adequate time to cure as per the manufacturer’s recommendations. This ensures a strong and waterproof bond.
Replacing damaged core material, when necessary, is crucial to ensure the structural integrity and durability of your fibreglass boat transom.
Selecting the right replacement material and executing the replacement process accurately is key to a successful repair.
Fibreglassing the Transom
The fibreglassing process is a critical step in restoring your boat’s transom. Follow these steps to apply fibreglass cloth and epoxy/polyester resin effectively:
1. Prepare the Fibreglass Cloth
- Cut the fibreglass cloth into sections that match the repair area. It’s essential to have a little extra for overlapping and ensuring full coverage.
2. Safety Precautions
- Prioritize safety when working with epoxy/polyester resin. Put on your safety gear, including protective clothing, gloves, a respirator mask, and safety goggles.
3. Wetting Out the Cloth
- Lay the cut fibreglass cloth over the repair area. Using a brush or roller, saturate the cloth with the resin. Start from the centre and work your way out to ensure even saturation. The cloth should become transparent, indicating that it’s fully saturated.
4. Remove Air Bubbles
- Gently work out any air bubbles or wrinkles in the cloth. An grp roller or a stippling brush can be useful for this. Ensure the cloth sticks smoothly to the transom without trapped air.
5. Layering
- To enhance strength and durability, apply multiple layers of saturated fibreglass cloth. Overlapping each layer by a few inches ensures a continuous and robust bond. Follow the recommended number of layers based on the repair’s requirements.
6. Apply Additional Coats
- After the initial layers, you may need to apply additional coats of resin to seal and protect the repair. Use a clean brush or roller to apply a thin and even coat.
7. Allow for Curing
- Allow the resin to cure according to the manufacturer’s instructions. This may involve waiting for several hours or days, depending on the type of resin used. Keep the repair area protected from dust, debris, and moisture during this time.
8. Sand and Smooth
- After the resin has cured, sand the repaired area to achieve a smooth and even surface. Use progressively finer grit sandpaper for the best results.
By following these steps, you’ll effectively apply fibreglass cloth and resin, creating a strong and waterproof bond on your boat’s transom.
The layering process is particularly crucial for added strength, ensuring that your repaired transom can withstand the rigors of boating.
Sanding and Finishing
Sanding and finishing are critical aspects of achieving a smooth, aesthetically pleasing, and high-performance transom repair. Follow these steps for an impeccable final finish:
1. Sanding Process
- Begin the sanding process once the resin has fully cured and hardened. Use a sequence of sandpapers with gradually finer grits. Start with a coarse grit (around 40-80) and work your way to a finer grit (around 180-320).
2. Achieving a Smooth and Even Surface
- Sand the entire repaired area methodically, applying even pressure to remove any imperfections, bumps, or uneven surfaces. Be patient and ensure that the entire area is smooth and uniform.
3. Use Fillers or Fairing Compounds
- If you encounter imperfections, such as small divots or uneven spots, you can use suitable fillers or fairing compounds. Apply them according to the manufacturer’s instructions and sand the area smooth once they’ve dried.
4. Inspect and Repeat
- After sanding and applying fillers, thoroughly inspect the surface to identify any remaining flaws. If necessary, repeat the sanding and filling process until you achieve the desired smoothness.
5. Importance of Final Finishing
- The final finish is not only about aesthetics but also performance. A properly sanded and finished transom reduces drag, enhances hydrodynamics, and minimizes the potential for water intrusion. It’s essential for your boat’s overall efficiency and longevity.
6. Clean the Surface
- Once you are satisfied with the finish, clean the entire area to remove dust and residue. Use a dampened acetone cloth to ensure the surface is clean and ready for the next steps.
A well-sanded and finished transom not only looks great but also contributes to your boat’s overall performance and longevity.
Take your time during this stage to achieve the best results, and your boat will benefit from your attention to detail.
Painting and Protecting
This section will assume that you are painting rather than re-gelling, which is a much more complicated process.
After completing the fibreglass boat transom repair, the final steps involve painting and protecting the transom.
Here’s how to ensure your repair is not only structurally sound but also visually appealing and well-preserved:
1. Selecting the Right Paint and Primer
- Choosing the appropriate paint and primer is crucial for the long-term protection of your transom. Select marine-grade products designed to withstand exposure to water and UV rays. Epoxy-based or polyurethane paints are commonly used for boat transoms.
2. Surface Preparation
- Prepare the repaired area by sanding it to achieve a smooth and even surface. Clean the transom to remove any dust, debris, or residue. The surface must be dry and free of contaminants before painting.
3. Primer Application
- Apply a marine-grade primer specifically designed for fibreglass surfaces. Follow the manufacturer’s instructions for mixing and application. Primer provides adhesion and ensures that the paint adheres properly.
4. Painting the Transom
- Once the primer has dried, apply your chosen marine paint. Use a brush, roller, or spray gun, depending on your preference and the paint type. Apply multiple coats as needed to achieve a uniform and durable finish.
5. Protecting the Transom
- To safeguard your transom from future damage and maintain its appearance, consider the following protective measures:
- Regular Maintenance: Implement a regular maintenance schedule, which includes cleaning and inspecting the transom for any signs of wear, cracks, or peeling paint. Address issues promptly to prevent further damage.
- Waxing and Polishing: Periodically wax and polish the transom to protect it from UV rays and saltwater exposure. This enhances the shine and prolongs the life of the paint.
- Use Transom Protectors: Consider using transom protectors or fenders to prevent damage from docking and mooring. These can safeguard the transom from impacts.
- Keep the Boat Covered: When not in use, cover your boat with a suitable boat cover or store it in a sheltered area to shield the transom from the elements.
By selecting the right paint and primer, applying them correctly, and following proper maintenance practices, you can ensure that your repaired fibreglass boat transom remains in excellent condition and looks its best for years to come.
Final Inspection and Testing
After completing the fibreglass boat transom repair, a thorough inspection and testing phase is essential to ensure the quality, durability, and reliability of your repair. Here’s how to carry out this crucial step:
1. Visual Inspection
- Begin with a comprehensive visual inspection. Examine the entire repair area closely, looking for any signs of imperfections, cracks, or unevenness. Pay attention to the edges, corners, and seams.
2. Water Test
- To check for any potential leaks or weaknesses in the repair, perform a simple water test. You can do this by:
- Plugging the drain hole (if present) to keep water from entering.
- Slowly filling the boat’s interior with water, paying particular attention to the repaired area.
- Monitor the area for any signs of water leakage, such as seepage or discolouration. If you notice any issues, address them promptly.
3. Functional Testing
- If applicable, test the transom’s functionality by mounting the outboard motor and conducting a series of checks. Ensure the motor mounts securely, the steering is responsive, and all systems operate as expected.
4. Maintenance and Prevention
- Encourage regular maintenance and inspections of your boat’s transom. Routine checks, cleaning, and prompt repair of any issues can prevent future problems and extend the life of your repair.
5. Document the Repair
- Keep a record of the repair process, including materials used, dates, and any specific instructions or notes. This documentation can be invaluable for future reference and maintenance.
By conducting a final inspection, performing a water test, and ensuring the functionality of your transom repair, you can confidently set sail, knowing that your boat is in excellent condition.
Regular maintenance and preventative measures will help maintain the integrity of your repair and extend the life of your transom.
Conclusion
In conclusion, the process of repairing a fibreglass boat transom is a rewarding journey that can save you both time and money.
Throughout this guide, we’ve covered key points to ensure a successful repair:
- Assessing Damage: Start by identifying the extent of the damage and whether replacement of core material is necessary.
- Safety Precautions: Prioritize safety at every step. Proper protective gear, well-ventilated work areas, and safe tool use are paramount.
- Tools and Materials: Gather the right tools and materials for the repair, ensuring you have everything you need before beginning.
- Work Area Preparation: A clean, organized, and safe workspace is the foundation for a successful repair.
- Removing Damaged Area: Accurate cutting and removal of damaged sections is vital for a sound repair.
- Replacing Core Material: If needed, replacing damaged core material is crucial for strength and waterproofing.
- Fibreglassing: The process of applying fibreglass cloth and epoxy resin should be precise and layered for added strength.
- Sanding and Finishing: Achieving a smooth and even surface is not just about looks; it enhances performance and durability.
- Painting and Protecting: Proper selection of marine-grade paint and regular maintenance will keep your transom in top condition.
- Final Inspection and Testing: A thorough final inspection, water test, and functional testing ensure the quality and reliability of your repair.
Above all, remember the importance of safety and precision throughout this process. Your safety should be the top priority, followed closely by the precision of your work.
The attention to detail you invest in your repair will pay off in the long run.
We encourage you to take on your own fibreglass boat transom repairs. With the right guidance, tools, and materials, you can extend the life of your boat and enjoy more adventures on the water.
Every repair is a chance to learn and become more self-reliant as a boat owner. So, set sail with confidence, knowing that you have the skills to maintain and repair your vessel when needed.
Additional Tips:
- Quality Materials: Invest in high-quality marine-grade materials for a longer-lasting repair. Your transom’s durability depends on the quality of the fibreglass cloth, epoxy resin, and core material you choose.
- Consult Experts: If you’re unsure about the extent of the damage or the repair process, don’t hesitate to consult with marine professionals or boat repair experts. Their advice can be invaluable.
- Follow Manufacturer Guidelines: Always adhere to the manufacturer’s guidelines for specific products, such as epoxy resin or paint. This ensures that you’re using these materials correctly.
- Proper Disposal: Dispose of hazardous materials, like used epoxy containers, in an environmentally responsible manner. Many communities have recycling programs for these materials.
- Consider Preventative Measures: To avoid future transom damage, consider installing transom protectors or fenders, which can absorb impacts during docking or mooring.
Helpful Resources:
- West System Epoxy: A trusted brand for marine epoxy products. Their website offers a wealth of information on epoxy application and repair.
- Fibreglass Warehouse: A resource for fibreglass supplies, including cloth, resin, tools, and accessories.
- BoatUS: The Boat Owners Association of The United States offers a wealth of resources, including articles, videos, and guides on boat repair and maintenance.
- Boat Repair and Maintenance Books: There are numerous books available on boat repair and maintenance that can provide in-depth guidance.
- Boat Repair Forums: Online forums like The Hull Truth have communities of experienced boaters who are often willing to share their knowledge and tips on boat repair.
Remember that while DIY boat repair can be rewarding, safety and precision should always be your top priorities. If you’re not comfortable with any aspect of the repair, seek professional assistance.
Frequently Asked Questions
Q1: When should I repair vs. replace my boat’s transom?
- A1: The decision to repair or replace depends on the extent of damage. Small cracks or delamination can often be repaired, while severe structural issues may necessitate a transom replacement.
Q2: How do I prevent transom damage in the future?
- A2: Preventative measures include regular maintenance, keeping the transom well-sealed and protected, and avoiding excessive loads or stress on the transom.
Q3: Can I repair the transom myself, or should I hire a professional?
- A3: DIY repairs are possible for those with the right skills and tools. For extensive damage or lack of experience, consulting a marine professional is advisable.
Q4: What types of epoxy resin and fiberglass cloth are recommended for transom repair?
- A4: High-quality marine-grade epoxy resin and fiberglass cloth are recommended. Consult your boat’s manufacturer or a marine supply store for specific product recommendations.
Q5: What is the estimated cost of transom repair?
- A5: Costs can vary based on the damage’s severity and the choice of materials. A ballpark estimate for materials and tools is between £200 to £800, but professional repairs can be more expensive.
Q6: How long does a transom repair typically take?
- A6: The duration depends on factors such as drying and curing times for epoxy resin. On average, it may take a few days to complete a transom repair.
Q7: What are the signs of a properly repaired transom?
- A7: A properly repaired transom should exhibit a smooth, structurally sound finish with no signs of cracks or delamination. It should also be watertight and perform well in water tests.
Q8: How can I match the repaired area with the rest of the boat’s appearance?
- A8: Achieving a seamless cosmetic finish involves proper preparation, priming, and matching the color and texture of the boat’s existing surfaces.
Q9: What are the environmental considerations when working with fiberglass and epoxy?
- A9: Dispose of hazardous materials responsibly. Follow local regulations for disposal and consider using eco-friendly epoxy products if available.
Q10: What should I do if I encounter unexpected challenges during the repair process?
- A10: Troubleshoot unexpected issues by consulting online resources, forums, or seeking advice from experienced boat repair professionals. Patience and problem-solving skills are key in such situations.
- Alternatively if you’ve already tried to repair your transom yourself and it hasn’t turned out the way you wanted simply click the button below and I’ll happily give you a free estimate.

Share Your Experiences and Questions
We hope this guide has been a valuable resource and that you now know how to repair a fibreglass boat transom.
Now, we encourage you to take action.
Whether you’ve successfully completed a transom repair, encountered challenges along the way, or have questions about specific aspects of the process, your experiences and insights can be incredibly helpful to others.
Please share your thoughts, experiences, or questions in the comments section below.
Whether it’s a helpful tip, a problem you’ve encountered, or a piece of advice, your contributions can assist fellow boat enthusiasts on their own repair adventures.
Together, we can build a supportive and informative community that fosters knowledge sharing and empowers everyone to tackle fibreglass boat transom repairs with confidence.
So, go ahead and join the conversation – your input is valuable!